I’m excited to share with you this tutorial on painting a watercolor crystal cluster. The first time I thought I’d try to paint crystals, I wasn’t sure if I’d be able to do it - they seemed rather complicated. Looks are deceiving, though! By drawing a series of simple lines and just remembering to include light and dark areas, one can achieve a dimensional crystal painting with basic drawing and painting skills. We are going for a loose interpretation of crystals rather than a super-realistic look, which makes this project flexible for a variety of skill levels. We will use a wet-on-wet technique with some final dry-on-wet touches.
If you give this crystal cluster tutorial a try and post it to Instagram, use the hashtag #melliezeetutorial and tag me @mellie.zee in the picture so I can see your work and send you some love!

Supplies:
- Watercolor paper (cold press 140 lb)
- Watercolor paint (I used two colors in this tutorial, Prussian Blue and a dark gray, but any main color for your crystal and a darker color for shadows will do)
- Round watercolor brush
- Pencil and eraser
- White gel pen (optional, but useful)
- Paper towel
- Water
Step 1: Sketch the Outline of the Crystals

Follow the above step-by-step guide and sketch the outlines of the crystals. Don’t worry too much about precision. Wonky angles actually make the crystals look more realistic than perfectly symmetric shapes and parallel lines.
Step 2: Add Facets

Add facets to each crystal by following the above steps. Again, don’t worry if your lines are a little different from mine. Crystals show all kinds of faceting!
Step 3: Light + Dark = Dimension

Before we begin painting, there are two things to think about: light and dark. To achieve a dimensional look, we will need to keep some areas white to indicate the reflection of light off the crystals, and we will need to make other areas dark, to indicate depth to the crystals.
In this tutorial, we will imagine a light source that is coming in from the upper left towards the crystals. We will try to keep facets that face this light source mostly white or only give them a pale wash of color. Also, light tends to reflect off the ridges of the crystals. Thus we will try to keep a thin white line unpainted between the facets (basically, where the pencil lines are) to mimic this. Don’t worry if you accidentally paint over the ridges – we can fix this at the end with the white gel pen.
The dark areas will be mostly at the base and in facets opposite the light source. However, crystals reflect and refract light in myriad ways, so you can get dark facets in the middle of light areas and vice versa. That means there is really no way to go wrong! Hurrah!
Step 5: Painting Wet-on-Wet


Slightly lighten the pencil lines with an eraser (but make sure you can still see them! I have a bad habit of over-erasing, which I regret every single time I do it).
We will start with the largest crystal in the back. I like to begin with a concentrated area of color and dilute my paint from there, so apply the blue at the base of the middle facet and use water to dilute the color upwards. Leave some areas towards the top of the facet unpainted as light will shine through this area. While the blue paint is still wet, get some of the dark gray paint on your brush and touch it to the base of the crystal and let the color diffuse into the blue (wet-on-wet painting). It is also useful to add a thin line of either more concentrated blue or the dark gray to the vertical sides of some facets to create added dimension. Continue painting the facets in this manner, keeping areas facing the light source white or very dilute in color, and maintaining a thin unpainted strip of white between facets.


Tip: Dabbing the wet color with a paper towel to lift areas of paint can add some nice dimension by creating lighter areas (and also can fix some mistakes if you accidentally make an area darker than you like).
Step 6: Add Crystal Base

Using water or a very dilute color, paint along the base of the cluster to create a loose cloud of pale color. Some of the paint from the crystals should bleed into this area. Using wet-on-wet technique, add some darker spots of color to create dimension.
Optional: Using a very dilute color or water to create a bleed, brush along the edges of the crystals to create a soft glow.
Step 8: Final Details

If you think your crystals need some added dimension, add some strokes of darker color on top of the dry paint (wet-on-dry technique). I like to create more dramatic shadows using this approach.
A white gel pen is convenient for adding highlights along the edges of the crystals or along ridge-lines.
When everything is good and dry, erase any remaining pencil lines, then stand back and admire your work!
Variations


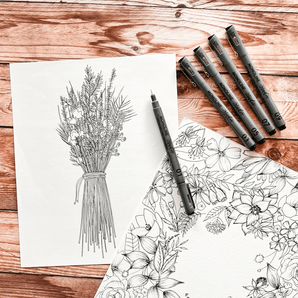
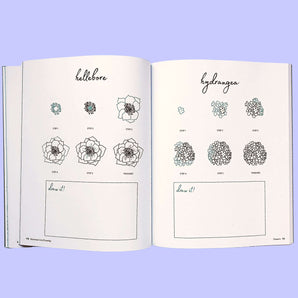
A few simple variations to try include adding a few more crystals, changing up the colors, and adding embellishments such as florals (inspo for these little blooms is from Peggy’s Botanical Line Drawing). Pinterest is a great source for crystal reference images. Most of all, have fun with it!


Hello there! I’m Melinda (@mellie.zee on Instagram). I’m not an artist by profession, but I re-discovered my creative side about 2 years ago when I decided I wanted to learn brush lettering. Now my interests - and art supply stash - have grown to encompass watercolor lettering and illustration, and I can’t imagine what I’d do without this creative outlet in my life.