Have you looked at those creative and cleverly created collages (try saying that 3 times fast) and wondered if you’d be able to make one yourself? Well, today we are going to use watercolor, line art and floral collage elements to create a one of a kind floral mixed media collage in 3 easy steps! So grab your inner child and your glue stick because we are about to make the best kind of mess together!

Supplies
- Watercolor paints in indigo and perylene green oOr any two analogous colors!)
- Watercolor paper (I used two 6” x 9” sheets)
- 1” watercolor wash brush
- Round 10 watercolor brush
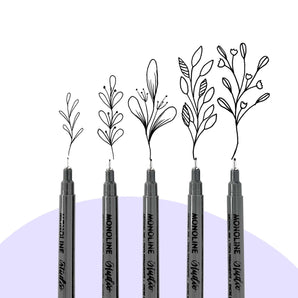
- Black monoline pen
- Washi tape
- Stickers
- Magazines or collage book for cut-outs
- Check out this PDF for some freebie florals to cut out!
- Scissors
- Glue
Follow along with the video!
Step 1: Paint the collage background and the watercolor wash sheet

Using the indigo paint, you are going to create a background to anchor your collage piece. Grab your size 10 round brush and saturate it in the indigo watercolor. Starting toward to bottom left side of your paper, you’ll be creating a cloud shape moving up and diagonally across the page. Add more water as you move along to allow the indigo to wax and wane in its saturation and opacity.
Once you’ve created an oval shape across the page, use some clear water to add droplets to the painted areas and add some indigo splatter to the remainder to the sheet. You can add splatter by dipping your brush in the paint and then tapping your brush against your index finger until you’ve reached your desire level of splatterness. (The more the merrier, I say!)

Setting your collage background off to the side to dry, grab your other blank sheet of watercolor paper. Use a bit of washi tape to hold down the edges since we will be using a lot of water for this step.
Using your 1” wash brush, cover the sheet in clean water. Next, dip your wash brush into the perylene green and add some bold brush strokes across the top half of the sheet. Your brush strokes should move from left to right, top to bottom.
Grab your size 10 round brush again and use it to drop in some perylene green and indigo spots to cover the bottom half of the sheet. Since the paper will already be wet the paint should blend and bleed into the paper and create some exciting textures. No mixing required! Set this sheet off to the side to dry.
Step 2: Cut out your floral and watercolor collage elements

While your watercolor sheets are drying, choose some floral elements that you’d like to add to your collage. I love to grab a few more than I think I’ll need just to make sure I have options! Using your scissors or craft knife, carefully cut around the perimeter of your florals.
A quick note on magazines and ephemera: You can purchase collage elements, washi stickers, vintage papers, etc. online. You can also use old magazines, photos or junk mail to source your collage bits and bobs. I had included a PDF with a few beautiful images that I found on Unsplash for you to print and cut out!

Use the watercolor wash sheet to add some watercolor shapes to your piece. Using your black monoline pen, add some dots to the top, green half of the sheet. Carefully tear the edges of this area to create a small rectangle. Place this on the upper, right hand portion of your indigo “watercolor cloud” that you painted earlier.
Next, cut out some circles from the bottom half of the watercolor wash sheet. Try to catch some bits of the fun texture and add some more elements to the circles with your monoline pen. You can’t go wrong with lines, dots, dashes or lettering.
Step 3: Decide on the composition and glue the collage elements on to your page

Now that you have all your elements cut out, move them around the page and decide on your composition. You’ll want to consider what direction you’d like the eye to travel, what colors do you like near/opposite each other and just what feels right to you. There is no wrong answer here!
Using your glue, start with the elements that are in the background first. Work your way to the pieces that are on the top of the design, being sure to glue down all the edges to prevent tears and fraying.

Once the glue is dry you can add the sticky elements, like stickers and washi, to your piece. I used some really cute starbursts from The Pigeon Letters x The Happy Planner collaboration sticker set as well as some pigeon washi tape because I am nothing if not obsessed with everything The Pigeon Letters.

And that’s it! You’ve channeled your inner child, got some glue on your hands and created your own floral, mixed media collage! Please (please) tag me if you share your work on social media! I can’t wait to see what you create!
While she spends her days (and nights) in the trenches of parenting, Julie somehow finds time to create art and loves to share it with you! She loves when art reminds her of life: weird and wonderful.

Julie gets called Julia so often that she has stopped correcting people. Her name is not and has never been Julia, but she now thinks of her as her artistic alter ego 🧑🎨
Connect with Julie on Instagram 🎨


