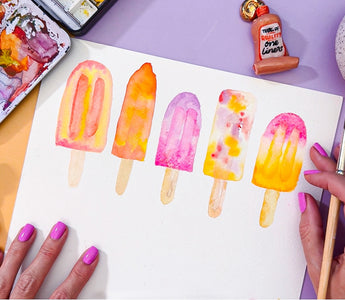
Welcome to a fun and colorful painting project! In this step-by-step watercolor tutorial , I'll walk you through the process of painting fun and easy popsicles using watercolor. This project is perfect for beginners and anyone looking for a fun summer painting project, and you'll end up with a delightful collection of painted popsicles that will make you crave the real thing! Let's get started.
Materials needed
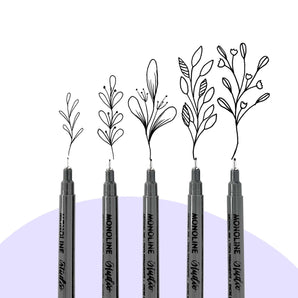
You can use any colors you want, but just because I know how nice it is to know exactly what people use when we see a color we fall in love with, here’s my list:
In case you love any of these colors, here’s the exact list of what I used:
Step 1: Form shapes with watercolor

Wet the area of the paper where you’ll be applying your base color. This helps the watercolor spread smoothly. Apply a light water wash to form the basic shapes of your popsicles on your watercolor paper. Don’t worry about details yet; focus on getting the general shapes and sizes right.
Step 2: Apply the first watercolor hue using wet-on-wet techniques

Choose a few bright and fun color hues that you think will look appetizing 🤤 For example, you might use shades of pink and orange 🍊 or red with green 🍉
Dab your chosen color to the bottoms and tops of your popsicles. If you want to add more color, you can do so while the base is still wet for a smoother blend.

Step 3: Make the watercolor more vibrant

As the base color begins to dry, you can add a little more paint to the top and bottom to replace the pigment that bled toward the center. This reestablishes the vivid color since it’s not as wet as the first application. So it won’t bleed as far, keeping that saturation poppin’!

If you want to add more depth, mix in additional hues while it still has a slight sheen of moisture. For example, you can apply another color on the other side of the popsicle to create a gradient effect.
Step 4: Paint the popsicle sticks

Paint the popsicle stick with a color that matches the overall look of your popsicle. You can also add darker shades to one side to give it a little depth as well.
Optional steps:

- Lift off excess paint: If you find that your colors are too intense or you want to create lighter areas, use a clean, damp brush to pull off excess paint. This technique helps in achieving subtle effects and highlights.
- Create special effects: For a more dynamic look, you can experiment with wet-on-wet techniques. Add some dots of color to your wet areas and let it blend naturally. This can create beautiful, blooming effects that can even mimic real popsicle textures!
- Define the edges: You could use the tip of your brush to refine the edges of the popsicles and add any final details. This will help your popsicles stand out and look more polished (but if you’re like me, embrace that messy, loose style!) 🎨

And there you have it—your very own collection of painted popsicles! I hope you enjoyed this creative process and that your popsicles turn out as delicious-looking as you imagined. Feel free to share your finished artwork with me by tagging me on social media. And when you do, share your favorite popsicle flavor. Yes, seriously. (mine’s banana 🍌)
Remember, this is a fun and relaxing project. Explore different colors and techniques, and don’t be afraid to get a little messy—after all, art is about having fun. Enjoy your popsicle painting session and maybe even reward yourself with a real popsicle when you're done!
Happy painting! 🎨🍭
[View more watercolor tutorials >>]


