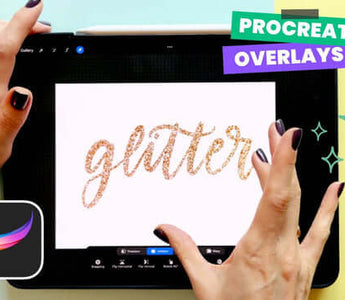
Ready to add some shimmer and shine to your Procreate artwork? Whether you're creating digital lettering, illustrations, or just want to give your design a bit of ✨ sparkle ✨ I’ve got you covered. I'll walk you through the easiest way to apply glitter overlays, where to find FREE glitter textures, and how to make them blend perfectly into your art.
Step 1: Find & download free glitter textures
To get started, you’ll need high-quality glitter textures. Fortunately, there are many royalty-free platforms that offer free-to-use images.

-
Visit royalty-free image sites like:
Search for keywords like “glitter” or “sparkle” to browse a wide selection of textures. Or you can visit my personal folder for sparkles right here!
-
Choose diverse textures:
- Glitter in sharp focus for detailed effects
- Out-of-focus glitter for a soft, dreamy look
- Textures with gradients or light reflections for added dimension
-
Download your favorites or copy the image directly to your clipboard and paste into Procreate
Step 2: Import glitter textures into Procreate
Once you have your textures ready, it’s time to bring them into Procreate.
- Open your project in Procreate
- Add a new layer to your canvas
-
Import the glitter image:
- If the texture is saved on your device, tap the wrench icon (Actions menu) → Insert a photo → select the image.
- If you copied the image, use the three-finger swipe down gesture and select Paste.

Step 3: Position & resize the glitter texture
Now that the glitter texture is on your canvas, you’ll need to position it correctly.
- Select the glitter texture layer
- Use the Transform Tool (arrow icon) to:
- Move the texture over the area where you want glitter
- Resize and rotate the texture as needed
- Be mindful of pixelation:
- Scaling up the texture too much can make it look pixelated (however, this can still work if you’re going for a “bokeh” or artistic blur effect)
Step 4: Blend the glitter image with your artwork
To integrate the glitter seamlessly into your design, you’ll use Blend Modes in Procreate.
- Select the glitter texture layer
- Tap the small “N” icon on the layer to open the Blend Mode options (it’s set to N by default - N = Normal blend mode)
- Experiment with modes such as:
- Screen: Brightens the glitter and removes black backgrounds
- Lighten: Keeps the brightest areas of the texture visible

Step 5: Customize the glitter effect
Take your glitter effect to the next level by customizing it to match your design.
Change hue & saturation:
- Select the glitter texture layer
- Tap the Magic Wand icon → Hue, Saturation, Brightness
- Adjust the sliders to change the glitter’s color, saturation, or brightness.

🔧 Troubleshooting tips
- Glitter looks pixelated: Try using a higher-resolution or larger image. Be careful not to resize a layer more than twice, as Procreate is raster-based and will continue to pixelate.
- Effect doesn’t look realistic: Try grabbing a glitter texture that has more depth in highlights and shadows or focal depth.
Adding glitter effects in Procreate is a fun and creative way to make your artwork sparkle. By following this step-by-step guide, you can easily apply stunning glitter overlays, customize them to match your style, and take your digital art to the next level.

Hey, I’m Peggy, a multidisciplinary artist and Procreate enthusiast who loves sharing tips and tricks to help fellow creatives level up their art! When I’m not creating tutorials, you can find me exploring new techniques, experimenting with color palettes (ok I’m always doing that), or getting lost in petting all the dogs.
Want more tips and tutorials? Check out my other Procreate resources, including my FREE Procreate Jump Start class! It’s everything you never realized you needed to know 🥳


