Procreate is a powerhouse of a drawing app, and it’s packed with tools that can simplify your workflow, speed up your process, and completely change the way you create. So many, in fact, that some of the most crucial need-to-know tools can be overlooked. In this post, I’m sharing 5 essential Procreate tools that every artist (from beginner to pro) should know.
Pssst… the last tool is my secret weapon and an absolute must for every project I work on.
Procreate Tool #1: QuickShape
Ever wish you could draw a perfect circle, square, or straight line? QuickShape makes it possible!
How to use QuickShape:
- Draw a rough shape (circle, square, line, etc.) on your canvas.
- Hold your stylus down at the end of your stroke—Procreate will automatically snap it into a perfect shape.
- Tap the teensy Edit Shape at the top of your screen to refine it even further.

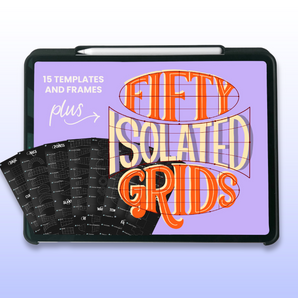
QuickShape is ideal for creating frames, grids, or even adding geometric elements to your artwork. It’s how I created my Procreate Lettering Grid Stamps!

Procreate Tool #2: Clipping Masks
Want to add shading, gradients, or textures without altering your base design? That’s where clipping masks shine.
Why clipping masks are a non-negotiable essential:
- They keep your projects non-destructive (you can edit freely without affecting your base layer)
- Perfect for creating highlights, shadows, or textures that stay within the boundaries of your design
How to apply a clipping mask:
- Add a new layer above the layer you want to modify.
- Tap the new layer and select Clipping Mask.
- Start painting or adding textures—your changes will only affect the layer below.
In the example below, I’ve got not one, not two, not three, but seven clipping masks attached to the same layer!

Pro tip: Experiment with textures like watercolor brushes or glitter overlays (because how fun).
Procreate Tool #3: Selection Tool
The Selection Tool makes precise selections easy in Procreate. It lets you isolate specific areas of your artwork, giving you full control over adjustments, from recoloring to erasing, without affecting the rest of your design on that layer.
Features of the Selection Tool:
- Freehand selection: Outline custom areas
- Add/remove areas: Refine your selections without starting over
- Rectangle or ellipse options: Create perfect shapes for cropping or edits
How to use it:
- Tap the S-shaped ribbon at the top to activate the Selection Tool
- Choose a selection mode (freehand, rectangle, etc.)
- Make your selection and adjust as needed (e.g. quickly isolate areas of your artwork for precise editing, such as recoloring or erasing)

Procreate Tool #4: Brush Studio
Okay okay, I know this is more than one individual tool. But brush customization is where it’s attttt! You can tweak existing brushes so they work exactly like you want/need them to, or even create your own Procreate brushes.
What you can do in the Brush Studio:
- Adjust brush size limits, pressure sensitivity, and texture
- Combine brushes to create unique effects
- Save your custom brushes for future use
How to access the Brush Studio:
- Open the Brush Library and select a brush
- Tap the Brush Settings icon to open Brush Studio
- Experiment away! I thoroughly cover these settings in my FREE Procreate Course!
Pro tip: If you’re into Procreate lettering or texture-heavy art, creating custom brushes can save you loads of time.
BONUS - Hidden Tool: Recolor
Recolor is a hidden gem that I use in nearly every project. It allows you to quickly and easily change colors in your artwork.
How to use Recolor:
- Invoke your QuickMenu - you can adjust how QuickMenu is accessed in your Gestures control panel
or texture-heavy art, creating custom brushes can save you loads of time.

2. Tap and hold one of the QuickMenu tabs, and select Recolor

3. Adjust the color to your liking!
Why it’s THE BEST TOOL Procreate has, like, out of everything:
Recolor is perfect for trying out different color schemes in live time so you can see ALL the hues, ALL the shades, ALL the tints… you get it.
These 5 tools will totally transform your Procreate experience. Whether you’re a beginner or a seasoned digital artist, they’ll save you time and make your workflow smoother and, most importantly, more enjoyable.
And if you’re new to Procreate or want to take your skills to the next level, don’t forget to check out my free mini-course to jumpstart your Procreate journey.

Hey, I’m Peggy, a multidisciplinary artist and Procreate enthusiast who loves sharing tips and tricks to help fellow creatives level up their art! When I’m not creating tutorials, you can find me exploring new techniques, experimenting with color palettes (ok I’m always doing that), or getting lost in petting all the dogs.
Want more tips and tutorials? Check out my other Procreate resources, including my FREE Procreate Jump Start class! It’s everything you never realized you needed to know 🥳


