Just when you think you cannot use flowers for anything other than drawing them over and over again (I'm not complaining!), here I am, coming at you with a new paper craft tutorial that will make you feel like a florist. I'm a HUGE fan of using items you have on hand to create some easy crafts from home. DIY is my best friend (don't tell my human friends) and it'll be yours too after you've finished this tutorial.
Today I want to challenge you lovely people: try a limited color palette. If you're able to, swatch out your colors before you start your project so you can see what colors you love together. Personally, I'm going with olive and cool green tones for my leaves. It's pretty much the ultimate combination.
Supplies
- Canson Marker Paper
- Tombow Dual Brush Pens (optional) - colors I used FYI: 243, 090, 076, 249, 098
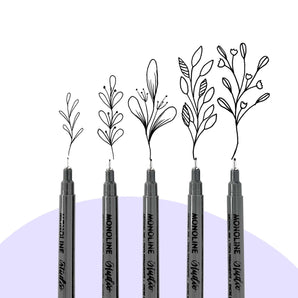
- Monoline Pen
- Gold Scissors
Step 1 (optional): Swatch your color palette

Swatching your colors is a super easy way to see what colors will work, and which won't. When I'm using markers, swatching is the BEST because I have a hard time committing to colors without being able to see how they'll work together first.
Step 2: Draw basic leaves

I was so inspired by my friend Jessica Mack to make these today because she makes the BEST floral bouquets that she cuts out. So, I decided to put my own spin on this and include lots of greenery and a limited color palette.


If you're not sure how to draw leaves and flowers, don't panic - I gotcha! Have a peek at my Botanical Line Drawing best-seller OR (and? There's never enough books!) check out Peggy Dean's Guide to Nature Drawing & Watercolor. Both are a great option, if I do say so myself 😉

Because these leaves will soon be a bouquet, make sure to give them some height when you start drawing. Don't feel pressured to make these look perfect, they'll look so much better if they have a few natural imperfections. Draw your leaves using S curves and C curves, this will give them some extra depth. You can also make the leaves on the individual leaves overlap, but don't overlap the two separate branches because we'll be cutting them.

Next, I made a fern-style branch or a horseshoe/full C shape leaf. This design is super simple, you don't need to do much to make these beauties look amazing.

I also added another branch with some leaves that overlap each other. Make sure your lines match up when creating an overlapping leaf! Hovering over the leaf "in front of" the leaf you're drawing behind it as you lift your pen to continue to the other side helps to maintain the line up.
Step 3: Add floral elements

Start your floral elements on a fresh new page. I'm starting with a really imperfect billy button, but you're welcome to do perfect circles as well. Add long stems below your perfectly imperfect circles to finish them off.
Step 4: Color your bouquet

Grab those isolated color palettes and get to coloring! If you change your mind on colors halfway through, that's okay! Just roll with it.
If being precise or DIY isn't your thing, how about this abstract floral tutorial?
Step 5: Cut out your bouquet

Once you're done with coloring, we can move onto cutting things out. Choose a general spacing between your actual art and how far you cut. The first thing to do is separate each element so you can actually see the closest point between the separation.

Once you have all of your leaves/flowers separated, cut them closer to shape. Definitely try to make them all the same amount of white space around, if that makes sense. Watch the video to watch me walk through this part.
Step 6: Assemble!

When you're finished cutting, start arranging your bouquet! You can see that my cutting is prettttty choppy but it's sort of my style, so it's actually very on-brand for me. This is when you can decide what you want to do with your arrangement, whether that be arranging them and then gluing them down OR making them into a handmade card.

Paper crafts are so fun because there are SO many things you can make and so many ways to add depth or dimension. I can't wait to see what you guys come up with.
Wanna try some other floral DIYs? Learn to embroider a cute lil dandelion.
Pin this tutorial if you want to try it out later or share it with some flower-loving friends.


