

Nothing says spring like getting your hands dirty, both in your garden and in your art practice! Today we are going to be making a bright and sunny papercut floral bouquet—so get your glue sticks, watercolor and scissors and let’s get started!
Supplies
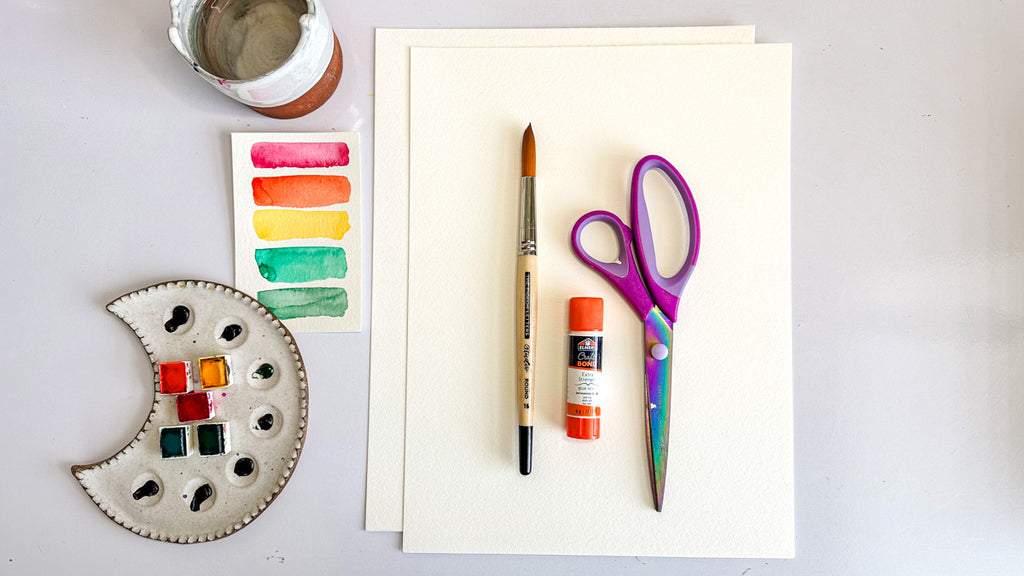
- 2 sheets of watercolor paper
- "Spring floral" watercolors (I chose magenta, orange, yellow and green)
- Round 16 watercolor brush
- Scissors
- Glue
- Pencil
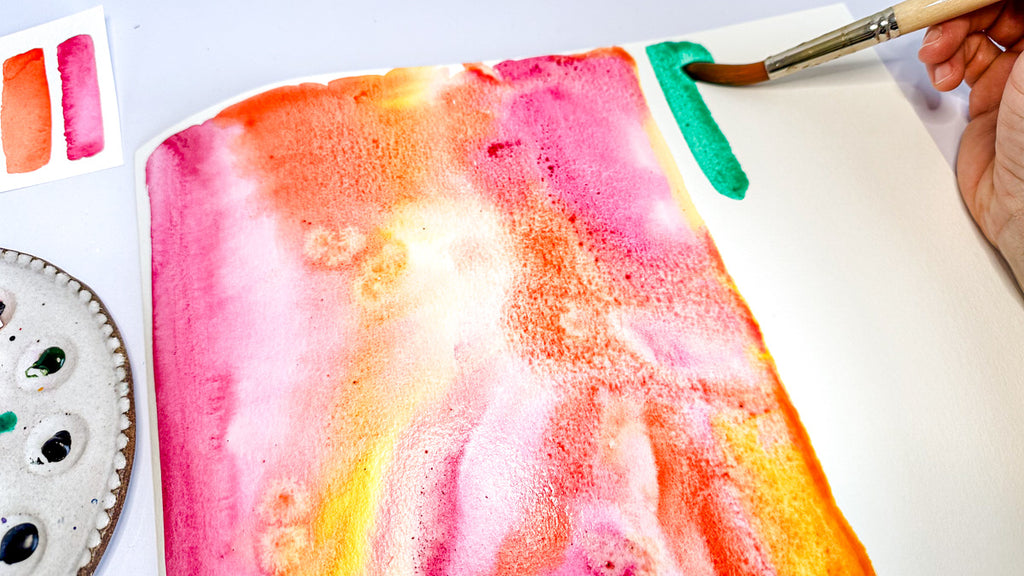
Step 1: Create a blended watercolor wash
Our first order of business is to cover one sheet of your watercolor paper in a watercolor wash. Using your large round brush and the three colors you chose for your florals (I’m using magenta, orange and yellow) you’ll use a varying amount of water and paint to just fill in about two-thirds of your sheet. Try not to over-blend these colors and just place each brush stroke next to the previous. The water and paint will work its own magic!
On the remaining third of your paper, use your green color and paint a wash. You won’t need as much of this color since you’ll be using it only for the stems and leaves.
Set this sheet off to the side to dry while you work on the next step!
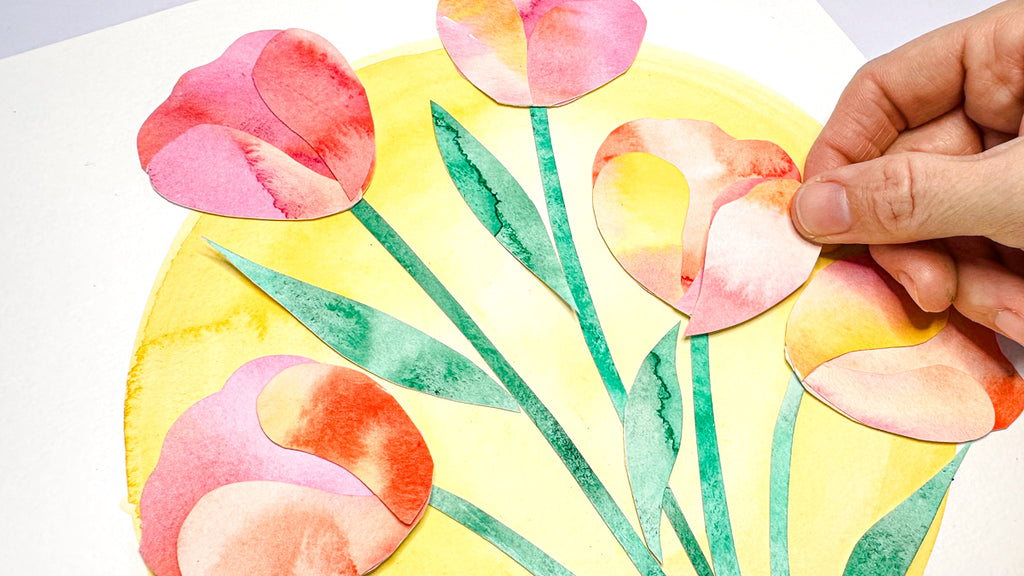
Step 2: Paint a circle in the background
Grab your second sheet of watercolor paper and your brightest color (I chose yellow). Lightly sketch or trace a large circle on your sheet and then fill it in with the paint. This will act as a background, or anchor, for your floral bouquet. Set this off to the side to dry as well.

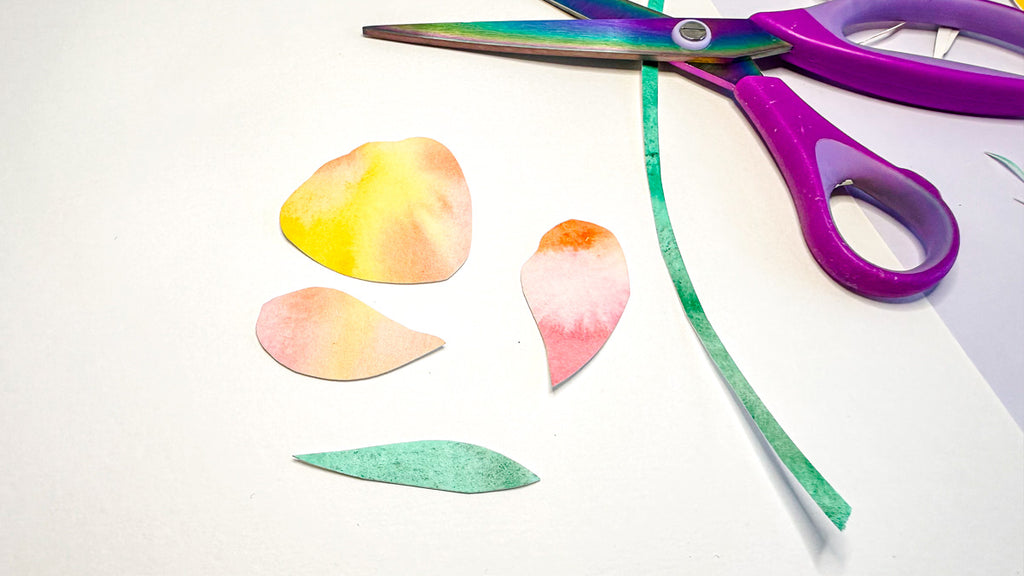
Step 3: Cut out shapes for petals, stems and leaves
Once your watercolor is dry, it’s time to move on to cutting! You can choose any floral shape you want, but I decided to go with the ultimate spring queen: tulips! As you can see in the above photo, to create a tulip you just need three general petal shapes. The first and largest will be the background petal. This one is roughly the shape of a corn kernel. On top of that you’ll place two tear drop shaped petals that will curve to each side of the first shape. Repeat this 3 to 5 times!
Once your flowers are where you want them (place around with different compositions until you’re happy!) you’ll want to cut out long, bendy stems with your green portion for each flower. The stems will meet at the middle to give them that bouquet feeling.
Next, cut out some long, organic-shaped leaves to fill in the gaps between stems and flowers. This is a great way to create movement in your piece. The long lines of the stems and leaves are what draw your eyes up to your gorgeous flowers.
Looking for more ways to bring botanicals into your watercolor paintings? I've got a book for that.

Step 4: Glue down the stems, flowers and leaves
The final step in this process is to glue down all your elements. You will work from back to front by gluing down your stems, then your flowers (and their petals) and finally gluing down the leaves.
During the gluing process feel free to edit as needed! Sometimes you need to trim a flower or a petal to make your flowers come to life. Take your time and have fun!
I hope you enjoyed this easy, breezy spring bouquet tutorial! Please share your results with me on social media because I would love to see what you create!
Meet Julie!

While she spends her days (and nights) in the trenches of parenting, Julie somehow finds time to create art and loves to share it with you! She loves when art reminds her of life: weird and wonderful.
Connect with Julie on Instagram 🎨 and check out more of her tutorials here.

