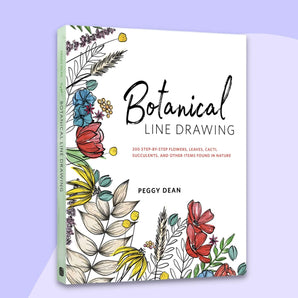
I love to create realistic effects using Procreate. In this tutorial, I’m going to show you how you can create a realistic 3D effect of a sticker and we are doing everything using procreate. For this example I’ll be creating an olive branch with the use of Peggy Deans awesome book Botanical Line Drawings.
If you have a Cricut or silhouette machine you can also use the first part of this tutorial up to the png part to create your own real stickers from your own illustrations.
Hi, I'm Brenda Bakker, artist and teacher based in the Netherlands. I'm on the Pigeonletters Design Team and I also teach on Skillshare.
Supplies:
- iPad
- Procreate app
- Stylus (I'm using the Apple Pencil)
- Procreate brushes: I’ll be using the Vintage Texture Pack
- Botanical Line Drawing book by Peggy Dean
Follow along with the video tutorial!
Step 1: Create a Lovely Botanical Line Drawing

Open the Vintage Texture canvas of your choice and, with the use of a slightly darker background, create or adjust to your liking. Create a fun line drawing using the Vintage Monoline brush. I used the easy step-by-step line drawing tutorial of the olive branch from the Botanical Line Drawing book.
Step 2: Color Block Your Painting

Create a new layer underneath your line art layer. On that layer, color the stem with the Diamond Liner Brush. Create another layer above that and color the leaves. Do the same for the olives. Make sure you have every new item on a new layer.
Step 3: Create Highlights and Shadows

Decide which side your light is coming from. Create a new layer above the colorblock of the stem and set it to clipping mask. On that clipped layer you now can create highlights and shadows using the Dry Edger Brush. Create a highlight by using a lighter color and shadows by using a darker color. Create a new layer above the colors of the leaves and repeat the previous steps for highlights and shadows. For the olives, you do the same but try to use another brush and see how that looks feel for you. I used the Antiqued Shader Brush for this part. But feel free to test and use some other lovely texture brushes. Explore them all!
Step 4: Create Extra Glossy Highlights

On a new layer above all but underneath the textured layers, and underneath the line drawing, you can create an extra glossy highlight above all the lighted sides of your art using the Pulpy Pointed Pen brush. This brings in extra joy and light to your painting. Who doesn’t want that, right?
Step 5: Prepare for Sticker Creation

In order to create a sticker you must prepare your illustration. You have to turn off all textured layers above and also turn off the background. At this point, you will have only the drawing with a transparent background. Do a three finger swipe and hit copy all. Create a new layer directly underneath the textured layer group and hit paste. You will now have the whole painting on one layer. This is what you are going to work with from now on. So, group all the layers below and make that group small so it is clean and tidy in your layers menu.
Step 6: Create a White Outline for Sticker
Now this is a bit of a hard part. Sometimes, it is easier to just try it with a red circle before you do the whole illustration, but the steps are the same. So follow these steps carefully! Remember: You can always undo if it doesn’t work on your first go. For this part, it is convenient if you choose a temporary darker background.
Step 1: hit the selection in the upper left corner, choose automatic (make sure color fill is off) and tap outside the drawing (sometimes you have to slide for a good fit), and you should see it turn blue.

Hit invert, go to feather, slide the bar until you see the sharp blue line to a size that will be good for the white sticker outline. Choose white as your color, create a new layer underneath your painting, hit fill layer.
If you have a darker back ground you will now see a vague white shimmer underneath your painting. You are now ready for the next step
Step 2: stay on this new white layer, hit selection at the left upper corner again. Make sure it is on automatic, hit outside the painting until blue, tap invert, and again tap fill layer.
At this point you should have a completely crisp white outline. And you now have your sticker!
Pro tip: Trouble shooting! Check two things if it doesn’t work for you. 1, check the color fill at the selection tool is off. And 2, when pixelated sticker border or still seeing the softer white. Try adjust the threshold when you automatic select the second time.

Step 7: Create a Shadow Underneath the Sticker

At this point, the sticker has its white outline but is “stuck” to the background. Let’s explore some more and let it lift off of the background. In order to do so we have to create shadow underneath the sticker. Go to the layer that has the white part of the sticker on it and duplicate it. Then, go to the one on the bottom and hit select; choose black as your color and hit fill layer. Then, move that black layer a little bit to the lower left corner. Your shadow is now there but it is still flat.
Step 8: Lift Up the Sticker

On the black shadow layer, go to the magic wand in the upper left corner, choose gaussian blur and slide a bit to the right. Just enough to create a somewhat softer shadow! This will lift your sticker up according to how much blur you use. Don’t overdo it though! At this moment, you will have 3 separate layers. The drawing, then the white layer and the black layer. Now, merge the drawing and the white sticker layer together (pinch with two fingers) you will have two layers now: the complete sticker and the shadow.
Let’s curl the ends up a bit to make it more realistic! Go to the sticker layer. Hit the arrow tool, choose warp and hit the advanced mesh. Now you can lift and bend individual places of that layer. Play and discover with it. Have you found a nice uplifting curl? Then you will see the shadows don’t match anymore. So let’s get over to the shadow layer. Tap the spaces underneath your uplifted pieces. Hit select, choose freehand and select those parts, feather those a bit. While selected, go over to the magic want and choose gaussian blurr again and just fade those parts of shadow where the sticker has lifted just a tiny bit. If needed make adjustments at the hue saturation and brightness with brighten the color just a tiny bit.
Step 9: Finishing Touches
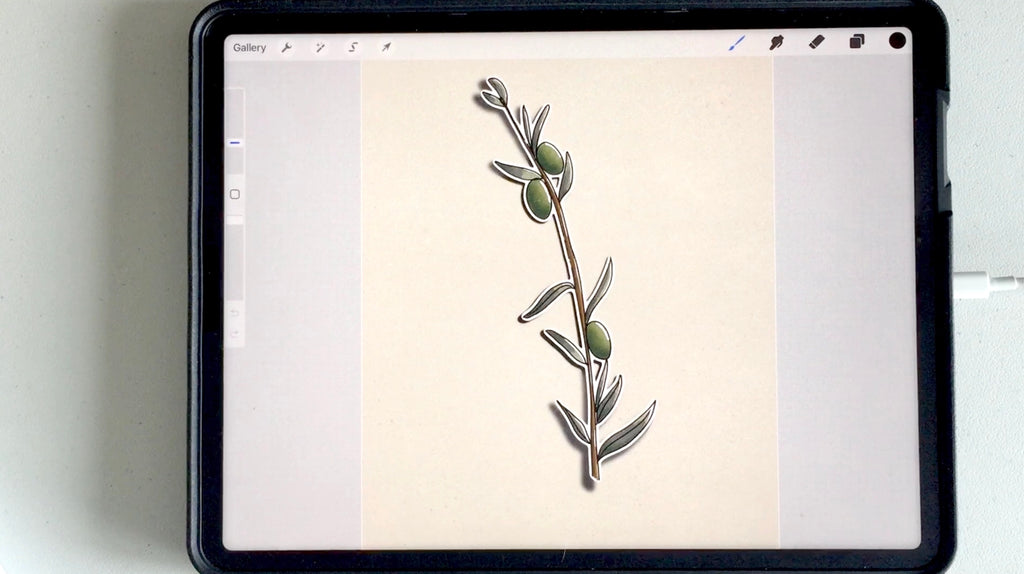
The only thing you have to do now is turn on the canvas texture layers again and also choose the background you want to use. And voila, you created a lovely sticker effect in Procreate!
Thank you for joining me in this tutorial. I know this was a hard one. But practice makes improvement and you can use this technique in a lot of fun ways. I hope you had fun and learned something new along the way. Tag me @dekwebbel and Peggy @thepigeonletters on instagram if you post your result, we would love to see it!

See all of Brenda’s tutorials on the blog!
Artist, illustrator, letterer and teacher, Brenda Bakker is a Procreate Addict who loves to experiment and explore all kinds of creativity, inside and outside the iPad as well. She loves bright colors, rough textures and smooth color blends.


