

I’m so so so excited to show you this Procreate tutorial. You’ll learn how to take floral doodles and hand lettering and weave them in together to create a blooming awesome piece of artwork!

Here’s what you’ll need to make this project:
- iPad + Apple pencil
- Procreate app
- TPL Procreate brushes: Lettering grids; Inking brushes; Vintage texture brushes
- Reference books or photos of florals (optional)
Step 1: Open a new document in Procreate
Create a new document in your preferred size; I’m going with a horizontal 10” x 8” canvas at 300 dpi.
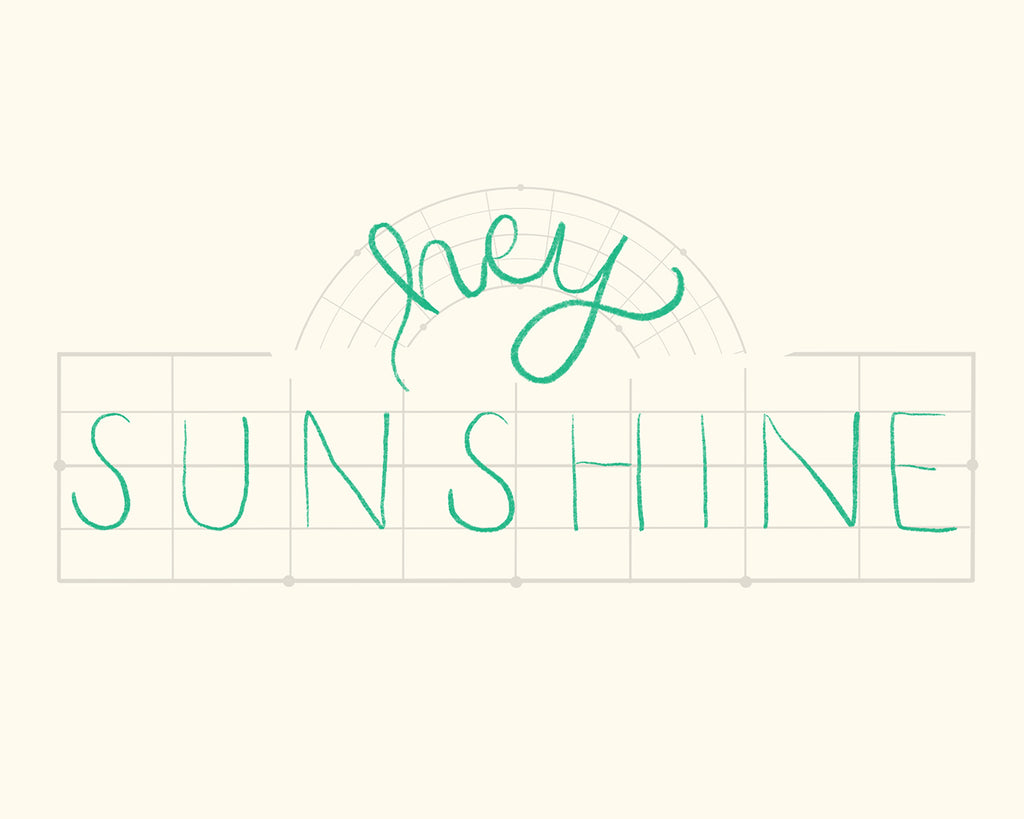
Step 2: Create grids and basic lettering
Use the lettering grid brushes to create a layout for your word or phrase. If you use multiple grids, stamp each one on a new layer so you have flexibility in moving and adjusting the layout. Once your grids look good to you, combine the layers and reduce the opacity to about 30-40%.
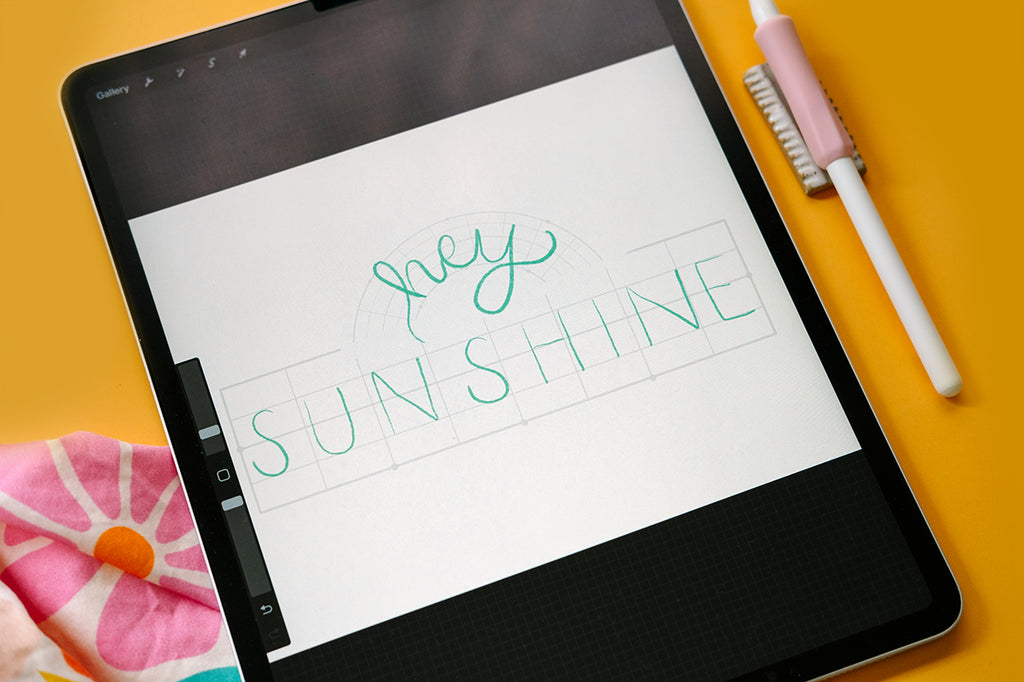
If you don’t have lettering grid brushes, draw your own guidelines! Use straight lines and curves to lay out where the baseline of your letters will sit. Flatten these into one layer and reduce the opacity.
Use a pencil brush (I’m using the Pigeon pencil) on a new layer to write your word or phrase. There’s no need to make this layer perfect - it’s simply here to act as the skeleton or ‘bones’ of the lettering. Move, resize, shift, center, and do any other adjustments to this layer to make sure the words are sitting right where you want them.
Step 3: Finalize lettering style
On a new layer (always!), use the lettering ‘bones’ as a guide to create your preferred lettering style. If you want to create bubble lettering, simply surround the skeleton letter, keeping your bubble letters even throughout your grid. This step typically takes me a few rounds of revising, so take your time and feel free to repeat as needed.

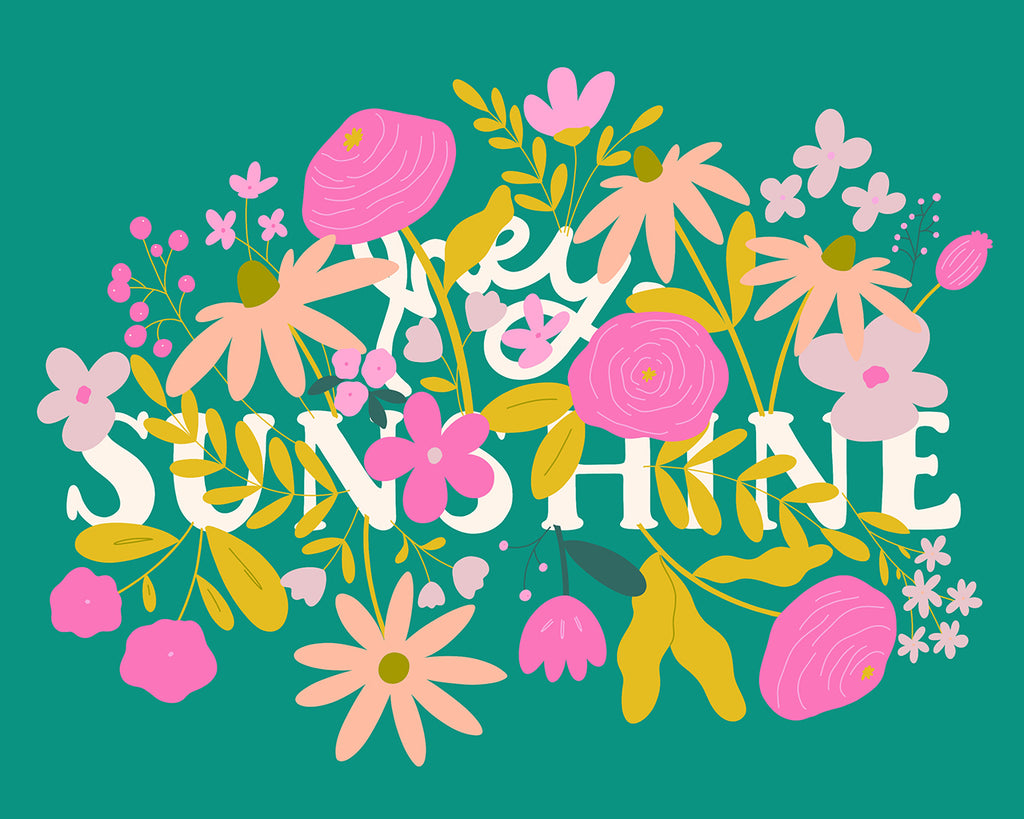
Step 4: Add florals overlapping and surrounding the words
It’s time to add flowers to your sketch! This part seems daunting, but take it one floral at a time. Create a new layer and if you’d like, refer back to your floral reference photos. Start doodling very simple flowers around the piece, allowing some to overlap the letters and each other. I like to make the stems grow out of the letters so there are no random stem ends poking out anywhere.
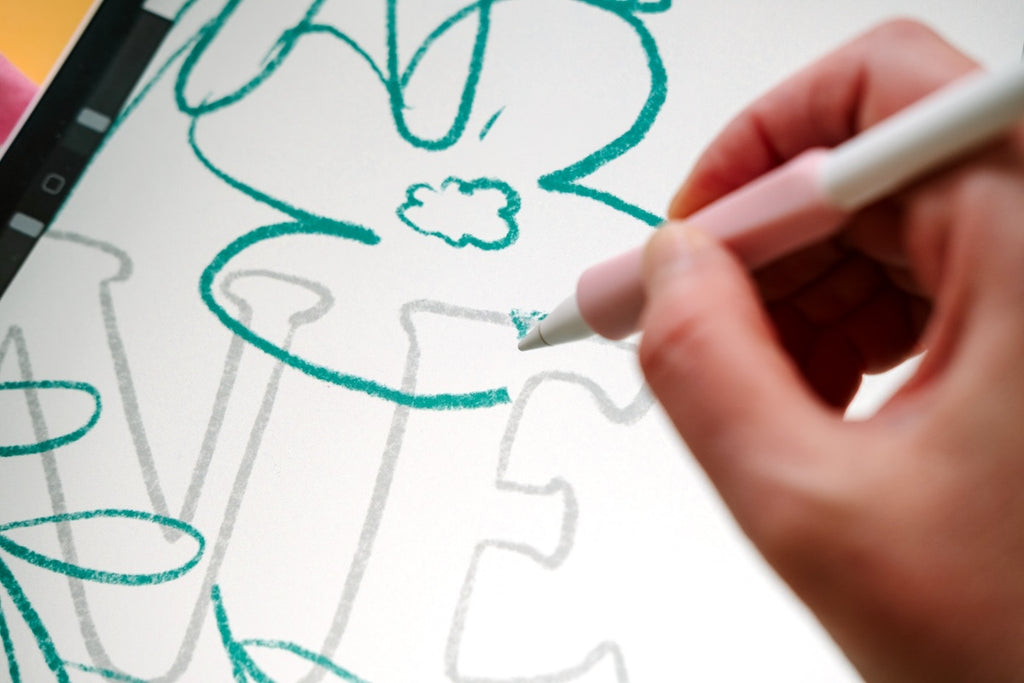
Make sure you rotate your canvas around a bit to make sure florals are ‘growing’ out of the bottom, too.
Just like with the lettering, once you’ve doodled the first floral layer, create a new layer and reduce the opacity of the florals. On the blank layer re-draw the flowers with as little or as much detail as you’d like - I’ve chosen to keep details to a minimum. This sketch re-drawing can be done as many times as necessary to get the composition that you want.

Step 5: Erase overlapping flowers and letters
Before moving on to inking, it’s best to get your sketch perfected as much as possible. Zoom in closely to your letters and decide which flowers and leaves you’d like to poke out on top of the lettering, and which bits you’d like to remain behind. For any flowers or leaves that will sit behind letters, erase the part of the plant that is overlapping. For flowers or leaves you want to sit on top of the letters, you can either erase the overlapped letter OR leave it be for now. This may be helpful so you can ink your letters easily.
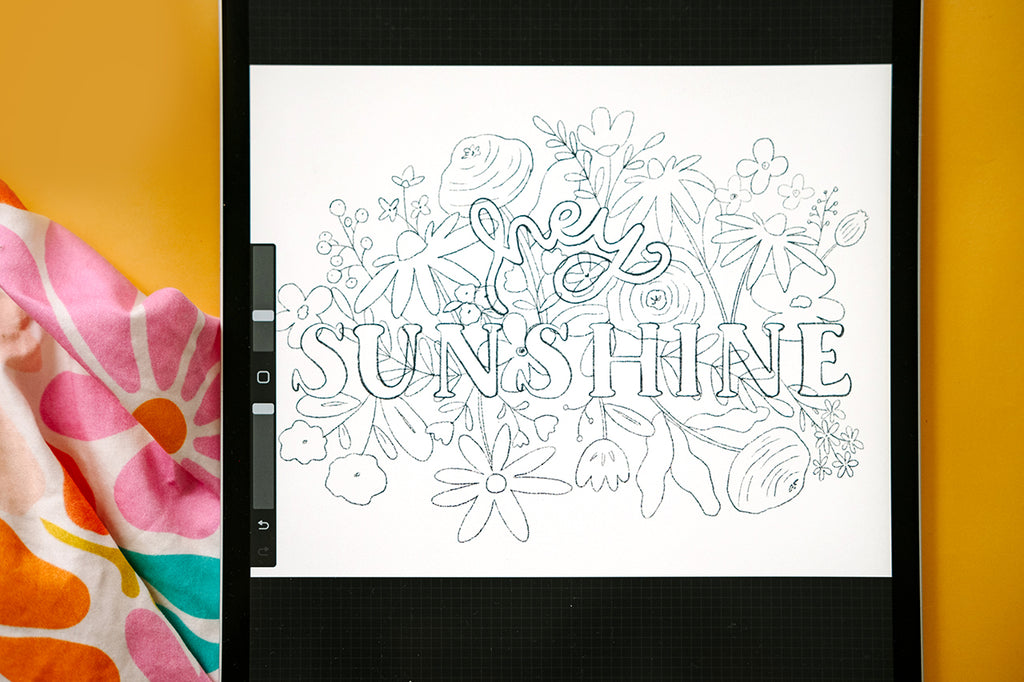
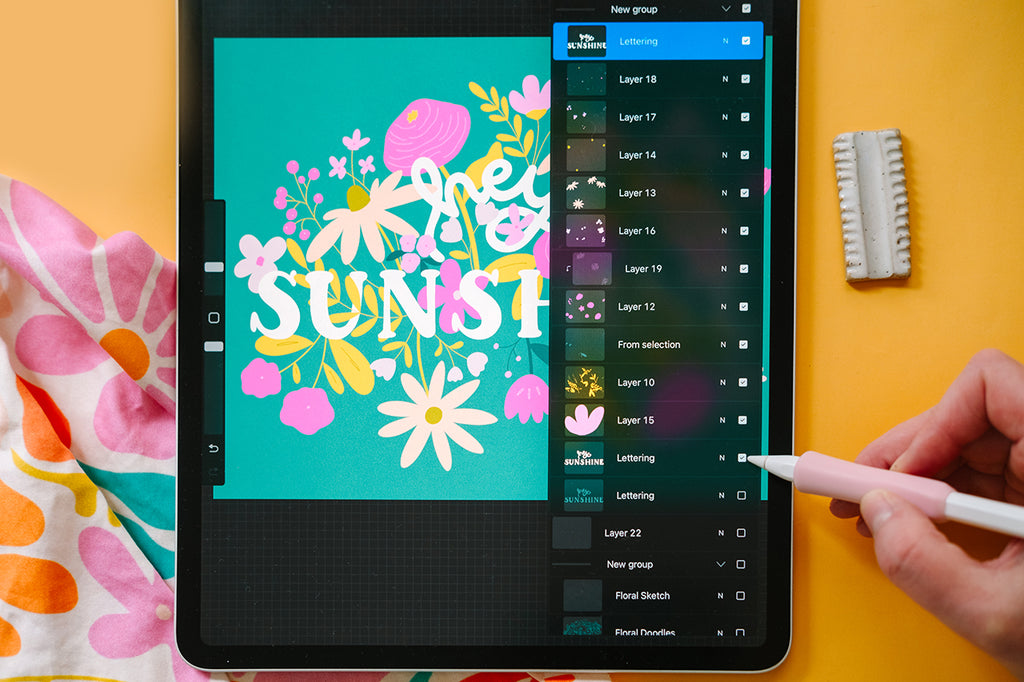
When this step is complete you can group all of your sketch layers into a group or flatten into one layer. I like to keep them on separate layers but condensed into one group in case I need to go back and make edits. Duplicate that group and flatten the duplicated group so you have your final sketch on one layer, but the separate layers still remain as a backup. Turn off the group, and reduce the opacity of the final sketch.
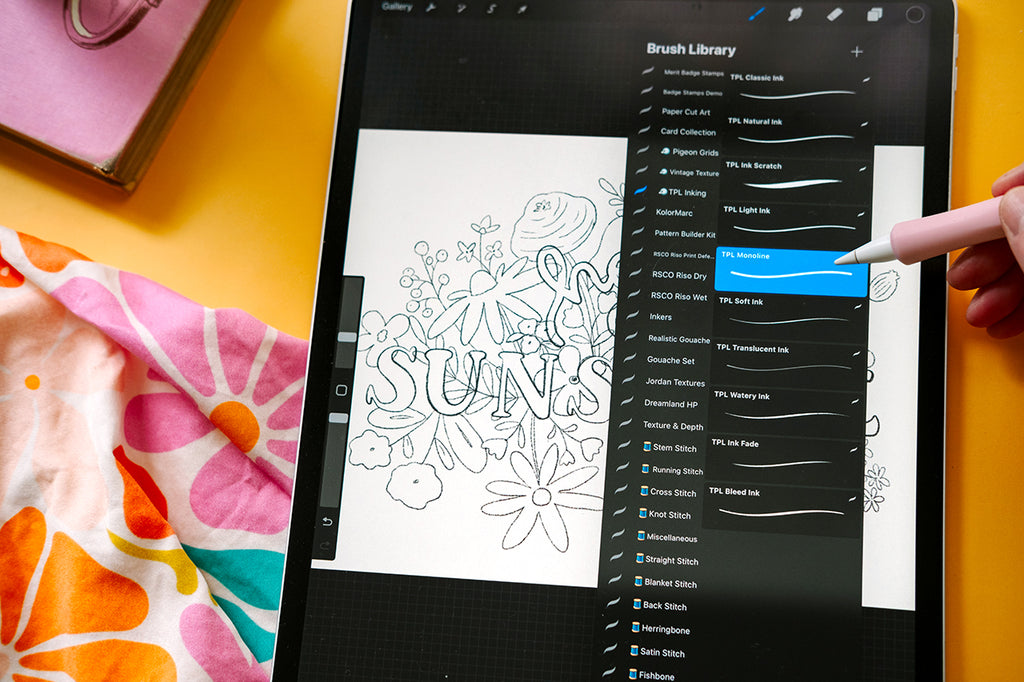
Step 6: Ink the words
Choose the brush you’d like to ink with - I’ve chosen the TPL monoline brush. On a blank layer, trace overtop of your lettering sketch and fill each letter/word in with your chosen color. You can keep each word on a separate layer, but I’ve chosen to keep my entire phrase on one layer.

Step 7: Add inked florals
Before inking the florals, I find it easier if I turn off the inked lettering for now. Create a new layer for each ‘level’ of florals: one layer for stems, one for leaves, one for petals, one for details, etc. You may want to make different colors on new layers as well.

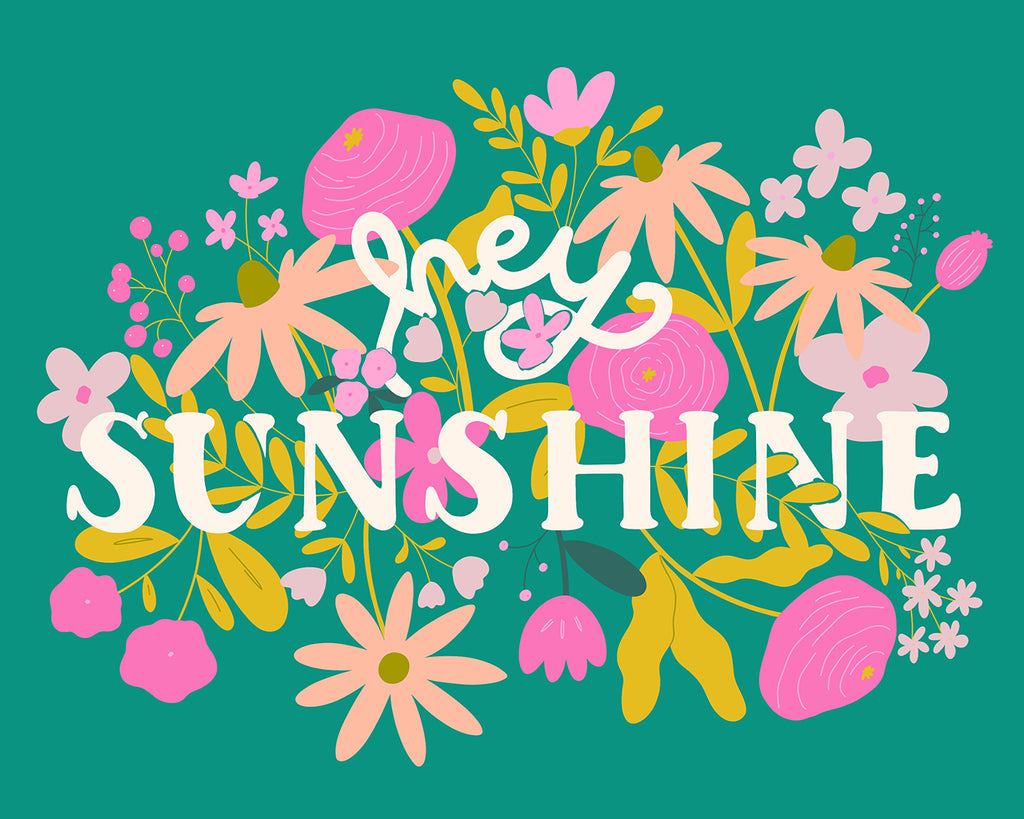
Step 8: Create overlap of lettering and florals
This is where everything comes together! Take your lettering layer (which should currently be on the bottom of all inking layers) and make a duplicate. Drag the duplicated layer all the way up to the top of your inked layer stack; you should have a sandwich with all of the floral layers sitting between the two identical lettering layers.
Turn off the bottom lettering layer for now and reduce the opacity of the top layer. Choose an opacity that allows you to see the floral layers beneath it, but make sure you can still distinguish where the letters are.
Go through your piece, letter by letter, and determine which bits of florals you want to have on top of the letters. For each bit of floral you want on top, erase part of the letter. You don’t have to be precise with this, as the identical lettering we kept on the bottom will fill in all of the excess that gets erased.

Continue around the piece, letter by letter, until you have made all of the erasing you’d like. Return the opacity of the lettering to 100% and turn on the bottom lettering layer once again.
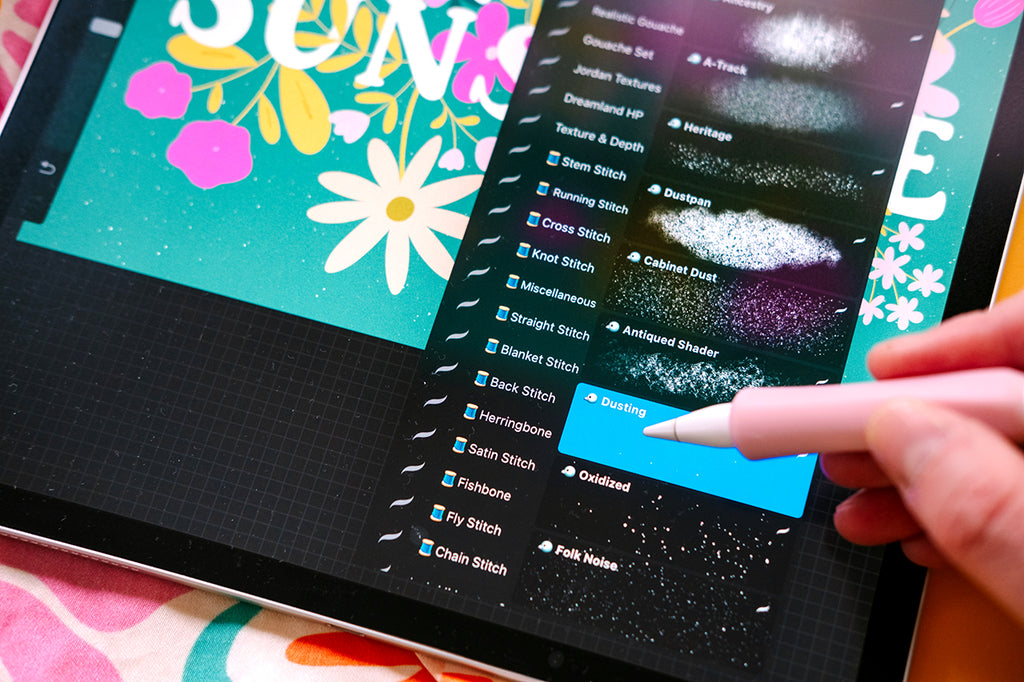
Step 7: Finalize colors and add background texture
If you want to change any colors in your piece, now is the time to do it!
Create a new layer on top of your background and choose a texture brush - I went with the Dusting texture brush from the vintage texture pack - and brush over the entire layer. Time to export and share!
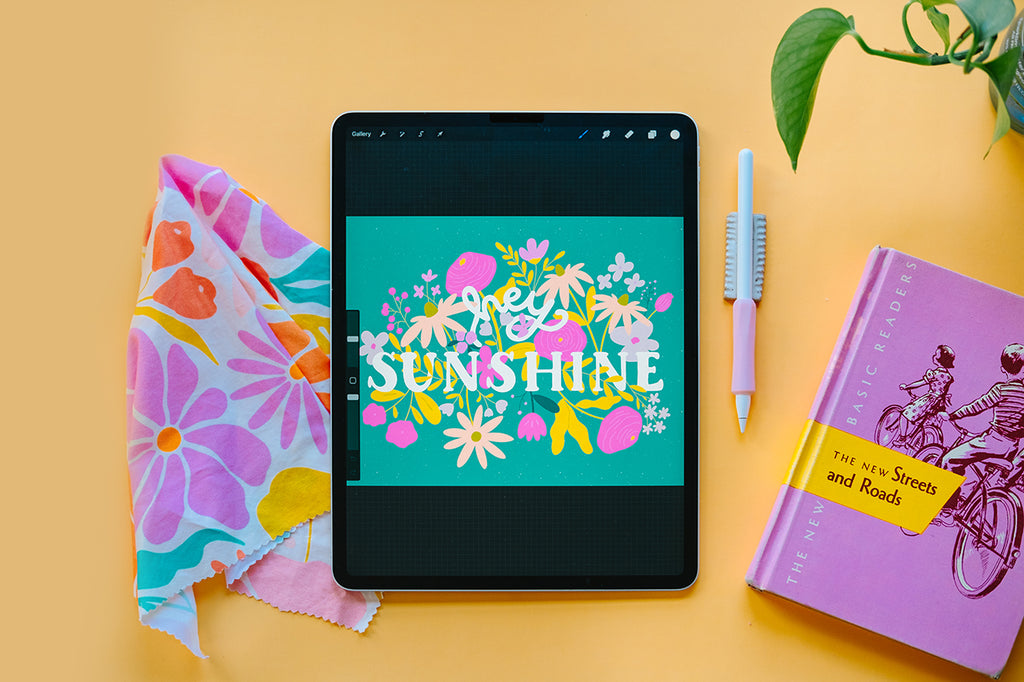
I really hope you enjoyed this Procreate tutorial! There are so many things you can do with this technique of combining letters and florals, like creating greeting cards or art prints.
See all of Alicia’s tutorials on the blog!

Alicia is a whimsical artist with a love of color and a refusal to act her age. She favors a mix of pastel and bright colors, reminiscent of southern California and the 1960s, and is inspired by her travels around the world, wildflowers that might have been found in a hippie's flower crown, and lettering that has a little bit of flair to keep it whimsical.

