Hi Makers! I am Julie Malizia of @harp_and_crow and I am going to share with you how to recreate my absolute favorite project: a Floral Galaxy Moon.
Materials:

- Watercolor paper
- Pencil and eraser
- 3 watercolor colors (I chose dark gray, dark blue and turquoise)
- Opaque white watercolor/paint
- Watercolor brushes: Round 6 and Round 1
- Compass (or circular object to trace)
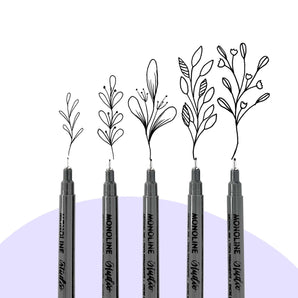
- Black ink pens
- Salt
- Water

Choose your three colors and swatch them on a piece of scrap paper to see how well they blend. I typically choose a dark gray or black and then two colors that will play well with each other. Have fun with this part! Choosing the colors and flowers is a perfect opportunity to customize this piece and make it your own! I often reference Peggy Dean’s “Botanical Line Drawing” and Alli Koch’s “Modern Florals” when choosing my flowers.
Step 1: Sketch
First, you will sketch out your moon. Use a compass, bowl or mug to trace a circle and then add in a smaller circle for the crescent. 
After the moon is sketched, lightly draw where you will add your florals. Leave some space for leaves and twigs, but remember that anything you draw into the moon portion will remain unpainted, so keep those tiny details for the outside. Next, sketch your florals around the shape of the moon.
Step 2: Ink
Using a size 03 or 02 black ink pen, outline your florals and add shading lines for detail. Allow the pen to dry for a few moments before you erase the pencil lines. Be sure not to erase your moon, though! 
Step 3: Galaxy Time
Galaxy paintings are my absolute favorite thing to do. They are each so unique, colorful and forgiving!
I use the wet-on-dry technique for my galaxies, meaning I apply wet paint to dry watercolor paper. I love how it makes the colors pop.

Start with your darkest color and paint the top of the crescent with your Round 6 brush. Use your Round 1 brush when you work closer to the florals. Move on to your next color and allow it to blend and bleed into the gray while working your way down the moon. Do the same for the third color until you are about halfway down the crescent. Next, and this is my favorite part, leave a little space for your “nebula”and use that third color again. Working in reverse you’ll go lightest to darkest down the crescent.
In that open space, use a clean brush and spread water between the two sections of paint. This will allow the paint to bleed into the water and give you a nicely textured section that looks like a nebula! If you use a little too much water, just dab it away gently with a tissue. Remember, have fun! You cannot mess this up!
Once all of the paint is applied, sprinkled a little bit of salt on the paint for texture.
Step 4: Baby, You’re a Star!
Use an opaque white watercolor for the stars. (I use Dr. Ph. Martins Pen White) If you don’t have any, you can use a white gel pen!

For the watercolor stars, dab a drop of white paint on top of your scrap piece of watercolor paper and use your size 1 brush to gently splatter the paint onto your moon by flicking the brush over the edge.
Step 5: Marvel at Your Work
You did it! And it’s gorgeous! You can personalize your floral galaxy moon in so many ways that will make it special. Add a hand letterered quote, some gold embellishments or shooting stars. The sky is the limit!

Please tag me on Instagram (@harp_and_crow) if you try this technique for yourself. I would love to see your work!

Julie Malizia is a lettering artist and illustrator living in California with her husband and three young daughters, whom she lovingly refers to as her “Dragons.” You can find her sharing galaxies and mom jokes on Instagram at @harp_and_crow.


