Painting a color wheel is a super easy and meditative exercise that can provide you with a wealth of knowledge on how to mix colors and also how they interact with each other.
Hi, I’m Shannon from The Pigeon Letters Design Team and in this tutorial, I’ll be showing you how to paint a color wheel using only 3 colors! Here’s a look at the supplies you’ll need to follow along:
Supplies:
- Watercolor paper
- Watercolor paints
- TPL #10 round paintbrush
- 2 jars of water
- Paper towel/tissue
- Large mixing palette
- Color wheel template (below)

Prefer watching the tutorial?
Step 1: Choose Your Primary Colors
Think of primary colors as the base colors that are used to mix all other colors. For this tutorial, I’m using the RYB color system in which the primary colors are red, yellow and blue.
To ensure that you mix bright vibrant colors, you’ll need to choose 3 primary colors that have the same temperature.
In color theory, the temperature of a color refers to how warm or cool that particular color is. Colors with a more yellow, orange or reddish undertone are referred to as warm while colors with more a blue/purple undertone are referred to as cool colors. This does not mean, for example, that all yellows are warm or all blues are cool. Any color can be warm or cool, just take a look at the image below:

Both of these are yellow but the first one has a greenish undertone so it is a cool yellow. The second one has an orange undertone so it is a warm yellow.
So when choosing your set of primary colors make sure they are either all warm primary colors or all cool primary colors.For this tutorial I’m using cool colors and these are Carmine, Cadmium Lemon and Ultramarine White Nights Watercolor.
Step 2: Set Up Your Palette
We’re going to be mixing 12 different colors to paint in our wheel, so you’ll want to use a palette that has enough space to mix these colors without them running into each other. Add your primary colors into the palette leaving space between them.

Step 3: Paint Your Primary Colors
Sketch the color wheel onto your watercolor paper.

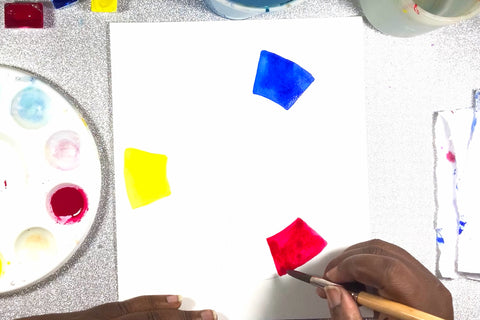
Using your paintbrush, add your primary colors to the wheel leaving 3 empty spaces in between each primary color. Be sure to thoroughly clean and dry your brush before moving on to another color, this way you won’t contaminate or dilute your colors.

Step 4: Mix and Paint Your Secondary Colors
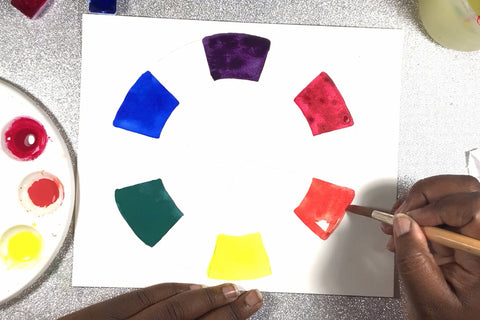
Secondary colors are colors that are created when equal parts of two primary colors are combined.
Use your paintbrush to pick up some of your yellow, and add it to an empty well or spot on your palette. Clean and dry your brush before picking up a similar amount of blue to mix into the yellow to create green.

Paint that color directly in between the yellow and blue on the paper.

Clean and dry your brush, then mix an equal amount of blue and red to create violet on your palette and add it in between the colors on your paper.

Repeat the same process, mixing equal amounts of red and yellow to create orange and paint it on the paper.

Step 5: Mix and Paint Tertiary Colors
Tertiary colors are colors that are created when equal parts of a primary and a secondary color are combined.
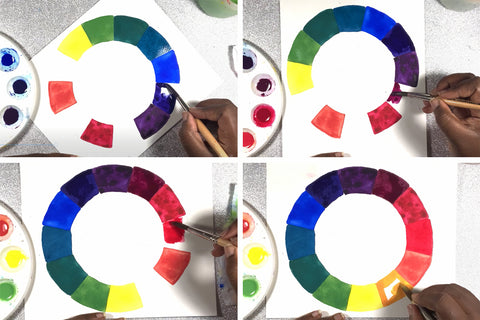
Mix equal parts of yellow and green then paint the yellow-green color onto your paper.

Repeat the mixing process to create blue-green and paint into the appropriate space on the paper..

To make the final 4 tertiary colors, mix equal parts blue + violet to create blue-violet, red + violet to create red-violet, red + orange to make red-orange and yellow + orange to create yellow-orange.

And now your color wheel is complete!

I hope you enjoyed learning how to paint a simple 12 color wheel using only 3 primary colors! If you followed these steps feel free to share it with me on Instagram @byshannonlayne so that I can see how it turned out!
See all of Shannon’s tutorials on the blog!
Shannon is an artist from a small island in the Caribbean called Barbados! She creates fun and unique content, whether it's with markers, watercolors, acrylics or on the iPad to inspire other creatives.


