In my last blog post I talked about places to find inspiration and today I’m going to take you through the steps I take to turn my inspiration into lettering!
I’m Shannon, a hand letterer and artist and a member on the Pigeon Letters Design Team. Today’s post is like a behind the scenes of how I create my pieces from start to finish. One of the sources I mentioned in the last post is food, and that’s what we’re doing today; creating letters inspired by donuts! So let’s jump into it!
Prefer watching this tutorial instead?
Step 1: Find References Images
Once you’ve have a general idea of what you want to create it’s now time to start gathering your reference material. I like to use Pinterest to help me find and save reference images. You can also use a royalty free image site like Unsplash, Pexels or Pixabay.
As you’re browsing through images take note of colors, textures and layouts that you may want to try out. For my design I know that I want to include icing and sprinkles, so I’m saving those types of images.
Step 2: Brainstorm and Plan
Study the reference images and see how you can incorporate certain elements from them, into your artwork. Then create thumbnail sketches trying different layouts, until you find a design you want to go with.
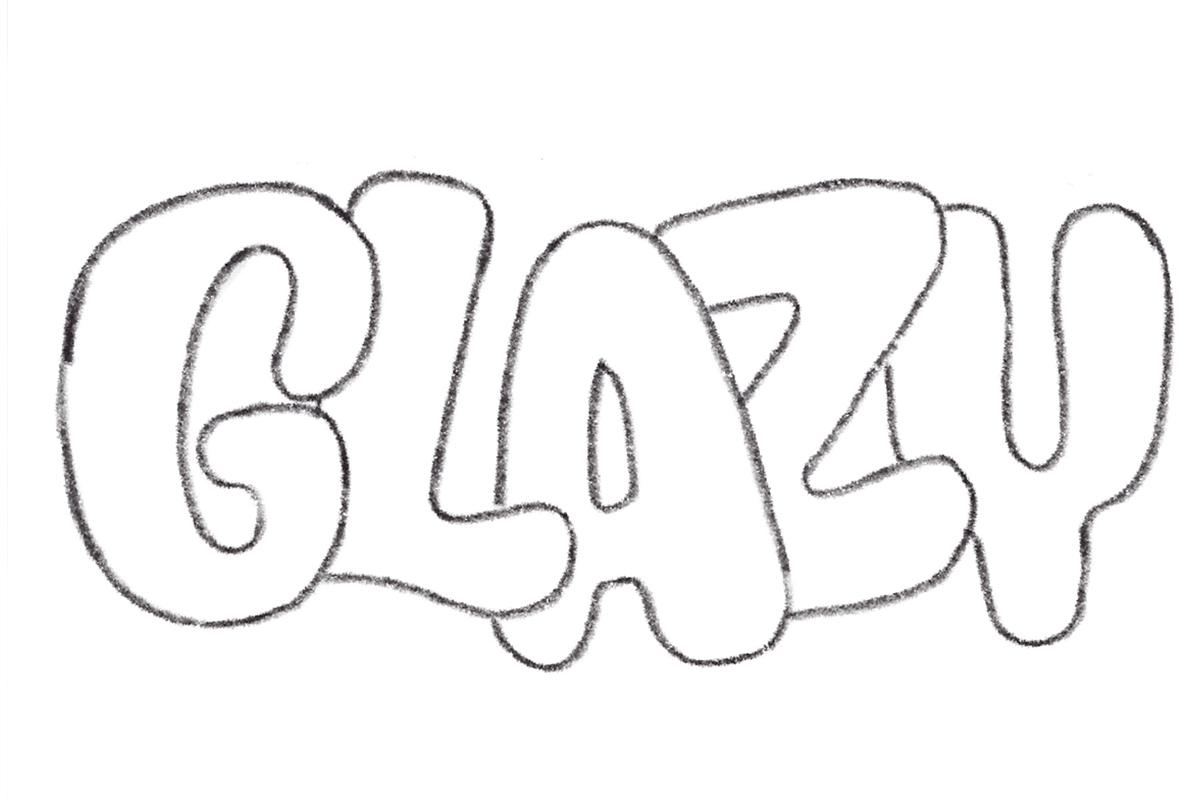
For this tutorial, I’m lettering the word ‘Glazy’ and I want each letter to be an individual donut so I’ve kept my letters rounded in a bubble letter style and I have them overlapping each other a bit but you are free to have yours however want.

Step 3: Refine Your Design
Once you’ve chosen the design you want to move forward with, it’s always a good idea to create a rough draft piece of scrap paper before you create your final artwork. At this step, you can also test out different supplies and colors to see what would be the best fit for the outcome you have in mind.
Then transfer your design onto the paper your final piece will be on.

Step 4: Gather Your Supplies
Here’s a list of the supplies, you’ll need to create donut letters with me:
- Watercolor paper
- Water based markers
- Small paintbrush and water
- White gel/paint pen for highlights
- Opaque paint or marker for the sprinkles
Now we can start creating the final artwork!
Step 5: Paint the Icing
Outline the icing with your desired color marker. Then use a wet paintbrush to pull some of that color into the center of the icing.

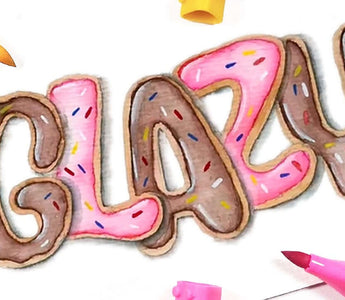
When that first letter is finished, Repeat those two steps to add the icing on the other letters. I’m using brown and pink and I’m alternating the colors but you can use one or as many colors as you’d like.

Step 6: Paint the Donut
Depending on the set of markers you have you may have to mix the light brown for the donut. I mixed some of the dark brown I used for the chocolate icing with orange and yellow on a palette to lighten the color (Make sure you test your color on a piece of scrap paper before you start using it.)
Then use your paintbrush to add the color on the outside of the icing. You’ll need to be very precise during this step because you don’t want to reactivate the color you added in the previous step and cause it to bleed into the color you’re adding.

Step 7: Add Shadows
Add a thin shadow to using a gray marker. I’m adding mine to the left and bottom of each letter. Then use your paintbrush to soften the outer edge of the shadow and fade it into the paper.

Step 8: Add Highlights
Use the white medium of your choice to add highlights in the upper left side of the icing.
Optional: Use your paintbrush to lightly fade the highlight into the icing.

Step 9 : Add Sprinkles
Use opaque paint like acrylic or gouache to add sprinkles on the icing. You can use as may colors as you like and that’s it!

I hope you enjoyed this week’s tutorial and seeing a behind the scenes of how I turned my inspiration into lettering. If you followed these steps and created your own donut letters, I’d love to see how they turned out! You can share it with me on Instagram @byshannonlayne!
Shannon is a freelance artist from a small island in the Caribbean called Barbados! She creates fun and unique content, whether it's with markers, watercolors, acrylics or on the iPad to inspire other creatives.


