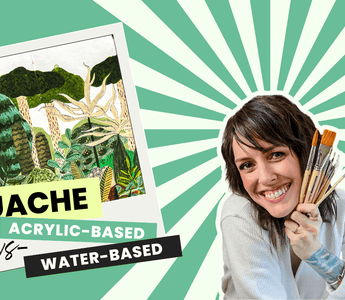
When we talk about gouache, it's important to note that the rules and techniques will be different depending on the type of gouache you're using. In this tutorial, I'll walk you through using acrylic as well as water-based gouache. You'll see the difference between the two as well as my favorite ways of using them!
Cute fact: these cruelty-free, artist-grade paintbrushes will work perfectly with whichever gouache you choose 😉

If you've ever used acrylics or watercolors, gouache should come fairly naturally to you. My favorite thing about gouache is the flat, creamy consistency you'll get when your artwork dries. No shine here, no no! The key difference between the two gouache types is that one can be reactivated with water (water-based gouache) and the other (acrylic) cannot - once it's dry, it's dry.
Acrylic-based gouache
Let's start off by exploring acrylic-based gouache (Holbein is by fav my fav).

I'm going to be using water for this to show you the versatility of the paint. Tip: if you want to make sure the bristles of your brush are fully wet, press it against the walls of your water container a few times.

Once your brush is nice and wet, grab a bit of paint (I'm using a Sta-Wet palette so I don't waste any paint I don't end up using). You'll notice almost instantly the difference in consistency that adding a touch of water creates. Some of the areas of your chunk of paint will become very watery, and others will stay very blob-like. And while both of those could work, what we're after here is a nice in-between creamy consistency. Once you get to that sweet spot, start putting down the paint.

You can already see the nice, creamy, flat, opaque finish that the paint is creating - and isn't that just so satisfying to look at? If you want to make your color lighter, just water it down - the more water you add, the lighter the color will become but it will still give you the same finish look.
If you want to mix colors to create your own blend, just do it the same way as you would with any other paint! A little goes a long way so spare your gouache and don't get too paint-happy when mixing colors.
Pssttt...you can also watch this tutorial down below!
If you love adding layers to your artwork, you can do that with gouache, too! I'll show you two techniques to give you an idea of what you're in for. Let's start with wet-on-wet.

As you can see, even though my first layer is still wet, I can apply another one without any issues. It will be more transparent, but it will still give you good coverage. If you want to add details to your design and have them be very noticeable, sharp and opaque, then wait for your base layer to dry before going in with more paint. You'll be surprised that going over the details just once will already give you a solid layered look!

Remember that wet area we painted over before? Let's go back to it now that it's almost fully dry and go over it with the same color so you can REALLY see the difference.

Pretty impressive huh? Acryla gouache is by far my favorite because of its versatility and how beautiful the colors look right out of the tube. And as a bonus it also photographs beeeautifully.
Water-based gouache
I keep my most used water-based gouache in my watercolor palette just because I looove the colors so much AND, just like watercolor, you can re-wet it (do NOT put your acrylic gouache in a palette unless you just want to throw some paint away).

When you swatch water-based gouache, you'll notice that it gives you a nice, even surface that is quite opaque.

You might be wondering - will one gouache type work over another? YES! Although, I will say that acrylic gouache over water-based gouache will give you a better result than the other way around.
Gouache is such a versatile medium that truly allows you to layer in multiple ways, depending on the effect and result you're after, so I strongly encourage you to experiment. And don't forget to tag me (@thepigeonletters) when you share your results!


I’ve this – should have watched before I did the gems for your sketchbook party this week (I am chronically ill and my best friend is going through terminal cancer even though I am 49 and she is early 50s so I want to show you my terrible art from your sketchbook party but I don’t know where to post it. It’s not good art at all but it makes me happy and I learned tons. But these injections have literally made me stupid and U can’t figure out technology anymore:(. Do you know where I could post my bad art from your sketchbook party?