You can follow the instructions below to paint your own unique flowers, or print the included PDF of flower and leaf motifs and skip ahead to Step 4 to jump right into the assembly!
I'm Carrie Alyson and I'm stoked to share this lovely little tutorial with you all today. I can't wait to see what you create!
Supplies

- Printable template
- Watercolors (I’m using QOR watercolors in Quinacridone Magenta, Quinacridone Gold, Green Gold, and Cobalt Teal)
- Watercolor Brushes (I’m using TPL brushes in size 8 & 10)
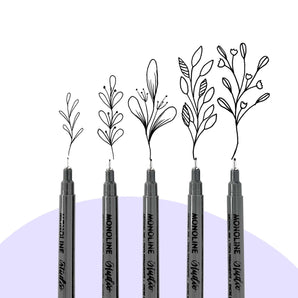
- Waterproof fine line pen in size 03
- Watercolor paper (I’m using 12x16” Legion Stonehenge Hot Press)
- Scissors
- Glue stick
Step 1: Practice Painting a Variety of Leaf Shapes

Mix Cobalt Teal and Green Gold watercolor on your palette with enough water to give it a milky consistency. With a saturated—but not dripping—brush, paint an upward stroke, starting with low pressure to create a thin point, then pressing down to create the fullness of the leaf, decreasing pressure to create another point.

Experiment with varying pressures and lengths of brush strokes to create a variety of leaves.

(For an in-depth tutorial on painting leaves, I’ll kindly direct you to Peggy’s expertise).
Want to learn botanical line drawing? I gotchu.
Step 2: Combine the Leaves into Motifs

Using the same techniques you practiced above, you can combine multiple leaves into lush branches.

Start with a curving stem and single leaf, adding additional leaves along the stem, staggering placement and angles. Imperfect, flowing, and organic is the goal! Fill a couple of sheets of paper with beautiful leaf motifs in a variety of shapes.

Don’t worry too much about composition, but leave enough space around each motif to cut them out.
Step 3: Paint the Flowers

Start by drawing the pistils and stamen in waterproof ink. Using a well saturated #10 brush, paint organic blobs of Quinacridone Magenta around the center. While the Quin Magenta is still wet, paint the center in Quinacridone Gold, letting the colors bleed and flow together freely.
After the paint has dried, pick up the fine liner again and draw five curved spokes coming out from the center of the flower. Next, outline the shape of the petals. Stay loose and organic, don’t worry about trying to trace the watercolor shapes exactly. Fill in the petals with additional lines to suggest detail and form.
Paint a few pages of vibrant anemones—to create the card as shown in my example, you’ll need 8 good-sized blossoms.
Nature and watercolor are just meant to be. Learn how to use them in Peggy's drawing guide.
Step 4: Assemble the Pop-Up

Cut a sheet of watercolor paper or sturdy cardstock to 8x12” and fold in half to create an 8x6” card. Print the spiral template on heavy paper and cut it out along the dotted lines.
Place the spiral inside the folded card as shown, with tab A near the bottom center. Apply glue to the underside of tab A, and press firmly to the card.
Then, apply glue to the top of tab B, fold the card closed, and press to adhere. If you’re messy like me, carefully open the card and loosen any other part of the spiral that may have stuck to the card or itself before the glue dries, then fold it back up to dry.
Step 5: Decorate the front of the Card

Choose your favorite flowers and leaves from the pages that you painted and cut them out.

Using a flower blossom and an assortment of leaves, glue an arrangement onto the front of the card, leaving room for the phrase “Happy Mother’s Day”. You can glue on the template included in the PDF, or add your own beautiful lettering.
Step 6: Build the Bursting Bouquet!


Here are a few guidelines for placing the flowers and leaves on the spiral and then I’ll let you run free to play:
-
Before gluing anything down, check to make sure your card will close without any petals or leaves getting caught in the fold.
-
Before gluing anything down, check if any pieces are extending past the edges of the card, especially if you plan to fit the card into an envelope.
-
I recommend trying to cover up most of the paper spiral with flowers and leaves if you wish to disguise the pop-up mechanism.
-
If you run out of flowers or leaves, paint (or print) more!
Don’t forget to sign the inside! I hope you enjoyed this tutorial, and I’d love to see what you create! Be sure to tag me @aspenhearted!
<3 Carrie

A lifelong artist, I started my career as a freelance illustrator before shifting roles to in-house graphic designer for a major travel guide publisher and a feminist press. I make my living as a graphic designer and illustrator for a preeminent leadership development organization for girls.
I love to paint in my free time, but when I’m not creating art, I like to get outdoors to find inspiration for new work. I love hiking and camping with my girlfriend, playing board games, reading tarot, and debunking my own mysticism. We live in a cute little house in the beautiful Pacific Northwest with a cute little black cat named River.
HEY! YOU! Wanna save this for later? Pin it!


