Floral illustrations can be intimidating. You see all those luscious, layered blooms and think, “Yeah, okay, but I’m still stuck drawing lopsided daisies that look like sad suns.” But fear not, fellow digital doodlers, because I’m here to break down how to use the Flower PowerPack in a way that’s ultra-flexible, and dare I say... kinda addictive.
Grab your iPad, your Apple Pencil, and maybe a snack (because once you start, you’ll forget what time is), and let’s get into it.
Full step-by-step below the video!
Step 1: Build your flowers with basic shapes
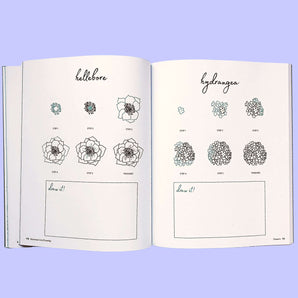
Let’s start with the good news: you don’t have to freehand every petal. Think of the first steps like the foundation of your flowers—simple blobs with aspirations. the artistic equivalent of Play-Doh flowers. You’ll add the pizzazz later. (Spoiler alert: pizzazz = texture. Lots of it.)
You can pick from face-up flower stamps, side-view and petal stamps, buds, leaves and compound leaves, and more.
It doesn’t have to be perfect!

Step 2: Keep floral foregrounds, centers, and backgrounds separate
This one’s important and will save you a lot of time later: separate the flower parts into different layers.
- Foreground petals
- Flower centers
- Background petals
- Leaves
- Texture layers
Keeping everything isolated means you can add shading, change colors, and adjust placement without wrecking the whole piece. Want to darken just the petals in the foreground? Easy. Want to try a different texture on the center without affecting the base shape? Also easy.

Step 3: Load on the texture
Now it’s time to zhuzh. This is where your inner texture addict gets to come out and play. Use the included texture brushes to build dimension. In this video, you’ll see me using Dense Stippling, Gouache Glaze, even one that looks like a Yellowstone hot spring had a baby with a watercolor pan (it’s my favorite brush in this set and it’s called Wild Pigment and it is not here to be subtle).
💡 Use clipping masks to keep everything neat and tidy.

>> Get instant access to the Flower PowerPack <<
Texture is where the real glow-up happens. Try building up shadows with darker tones, then adding lighter highlights for contrast. You don’t have to go overboard—a little goes a long way.
The Flower PowerPack is designed to make floral illustration in Procreate faster, more flexible, and more fun. By keeping your shapes simple, your flower sections separate, and your textures layered, you’ll achieve clean, stylized artwork without needing a hyper-detailed plan.

You’re basically a digital botanist now.
So yeah, turns out the secret to gorgeous floral art can be simple—basic shapes, layering texture, and a brush set that lowkey does most of the work for you.


